Tips for saving heirloom tomato seeds properly for next season’s country garden?
There’s a unique satisfaction that comes from cultivating a country garden filled with heirloom tomatoes. Their diverse shapes, vibrant colors, and unparalleled flavors are a testament to gardening heritage. But the true magic lies in preserving these genetic treasures for future seasons. Saving your own heirloom tomato seeds not only saves money but also ensures the continuity of your favorite varieties, adapting them to your specific garden environment over time.

The Magic of Heirloom Seed Saving
Unlike hybrid varieties, heirloom tomatoes breed true from seed, meaning the plants grown from saved seeds will produce fruits identical to the parent plant. This allows you to maintain unique flavors, resist local pests and diseases, and keep a piece of horticultural history alive. For a country garden, this means a reliable harvest of beloved tomatoes year after year, fostering a deeper connection to your land and its bounty.
Preserving these seeds is a simple yet rewarding process that contributes to biodiversity and self-sufficiency. It’s an act of faith in future harvests and a celebration of sustainable gardening practices.
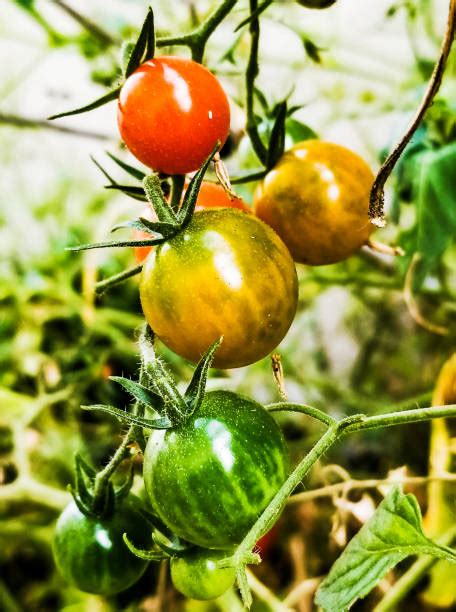
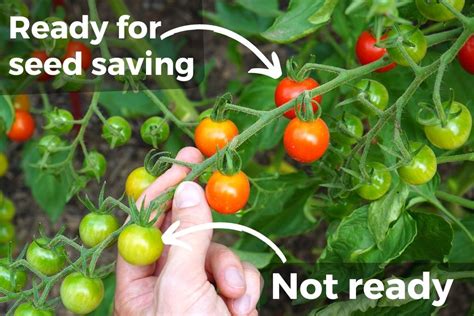
Selecting the Best Tomatoes for Seed Saving
The foundation of successful seed saving begins with choosing the right parent fruit. Select tomatoes from your strongest, healthiest plants that exhibited desirable traits – excellent flavor, good size, disease resistance, and robust growth. Ensure the fruits are fully ripe, as immature seeds may not be viable. Crucially, confirm they are true heirloom varieties, not hybrids (often labeled F1), which will not produce offspring true to the parent.
Avoid saving seeds from plants that showed any signs of disease, even if the fruit itself looks healthy, as diseases can be transmitted through seeds. The goal is to select the most vigorous and representative specimens of the variety you wish to perpetuate.
The Fermentation Method: Step-by-Step Guide
The fermentation method is widely considered the best way to save tomato seeds. This process breaks down the gelatinous sac surrounding each seed, which contains germination inhibitors, and also helps to kill off seed-borne diseases. It mimics natural processes and significantly improves germination rates.
Step 1: Extract the Seeds
Cut your selected ripe tomatoes in half horizontally or vertically. Using a spoon or your fingers, scoop out the seeds and the surrounding pulp into a clean glass jar. You can gently squeeze the tomato halves to help release the pulp and seeds. Don’t worry about getting every last bit of pulp; a little extra is fine.
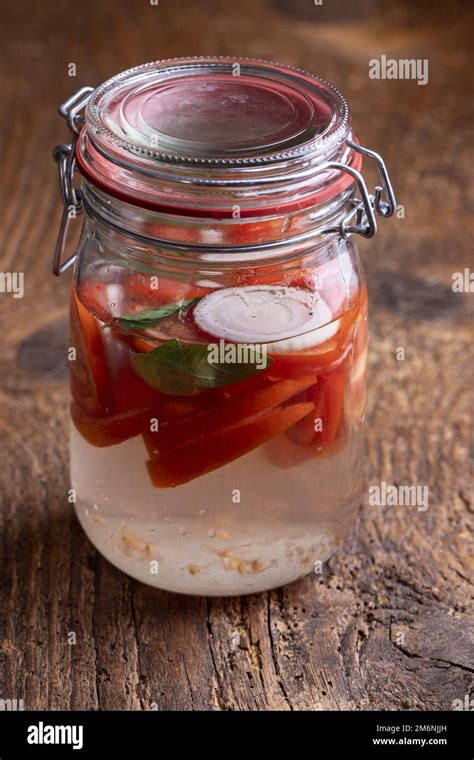
Step 2: Ferment the Pulp
Add about half an inch of water to the jar with the seeds and pulp. Cover the jar loosely with a lid, plastic wrap, or a piece of cloth secured with a rubber band to allow air circulation but prevent fruit flies. Place the jar in a warm spot out of direct sunlight. Over the next 2-5 days, the mixture will ferment. You’ll notice mold forming on top and possibly some bubbles. The good seeds will sink to the bottom while the pulp and bad seeds float.
Step 3: Rinse and Clean
Once the seeds have sunk and a layer of mold/scum has formed (usually within 2-5 days, depending on temperature), it’s time to clean them. Carefully pour off the moldy layer and most of the water. Fill the jar with fresh water, stir, and let the good seeds settle again. Pour off the cloudy water. Repeat this rinsing process several times until the water runs clear and the seeds are free of pulp.
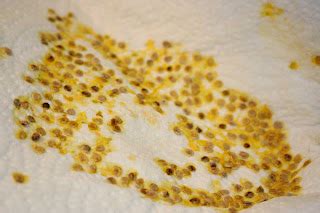
Step 4: Dry Thoroughly
After rinsing, spread the clean seeds in a single layer on a non-stick surface. Options include a ceramic plate, a window screen (for good airflow), or a coffee filter. Avoid paper towels, as the seeds might stick. Place the seeds in a warm, dry area with good air circulation, away from direct sunlight. Turn them occasionally to ensure even drying. This step is crucial; incomplete drying can lead to mold or a lack of viability.
Proper Drying and Storage for Longevity
The seeds must be completely dry before storage. This can take anywhere from a few days to a couple of weeks, depending on humidity and temperature. They should feel brittle and snap when bent, not be flexible. If there’s any doubt, allow them to dry for a few more days.
Once thoroughly dry, label your seeds clearly with the variety name and the date saved. Store them in airtight containers, such as small glass jars, plastic baggies, or paper envelopes, kept in a cool, dark, and dry location. A cupboard, closet, or even a refrigerator can work well. Proper storage is key to maintaining seed viability for several years.
Testing Seed Viability (Optional but Recommended)
If you’re unsure about the success of your seed-saving efforts, you can perform a simple germination test. Place 10 seeds on a damp paper towel, roll it up, and put it in a plastic baggie in a warm spot. Check daily for sprouts. If 7 out of 10 seeds sprout, you have a 70% germination rate, which is good. This helps you plan your planting quantities for the next season.
Conclusion: Cultivating a Legacy
Saving heirloom tomato seeds is more than just a garden chore; it’s an act of preservation, a step towards self-sufficiency, and a delightful way to deepen your connection to your country garden. Each tiny seed carries the promise of unique flavors and bountiful harvests, bridging the gap between past traditions and future possibilities. Embrace this rewarding practice, and enjoy the authentic taste of your homegrown legacy for seasons to come.