What are easy DIY steps for canning garden produce safely?
Preserving Your Harvest: A Guide to Safe Home Canning
There’s immense satisfaction in harvesting fresh produce from your garden. Even better is the ability to enjoy that goodness long after the growing season has ended. Canning is a time-honored tradition that allows you to store fruits, vegetables, and even complete meals safely. While it might seem daunting, breaking it down into easy, manageable steps with a focus on safety makes it an incredibly rewarding DIY project.
Understanding the Basics of Canning Safety
The first and most critical step in home canning is understanding food safety. Improper canning can lead to serious health risks, including botulism. The type of canning method you use depends on the acidity of your food:
- Water Bath Canning: Ideal for high-acid foods like fruits, jams, jellies, pickles, and tomatoes (with added acid). The high acidity prevents the growth of harmful bacteria.
- Pressure Canning: Essential for low-acid foods such as most vegetables (beans, corn, carrots), meats, poultry, and soups. A pressure canner reaches much higher temperatures than boiling water, which is necessary to destroy bacteria that thrive in low-acid environments.
Always use recipes from trusted sources like university extension offices or reputable canning guides, and never deviate from processing times or ingredient lists, especially concerning acidity.
Essential Equipment for Home Canning
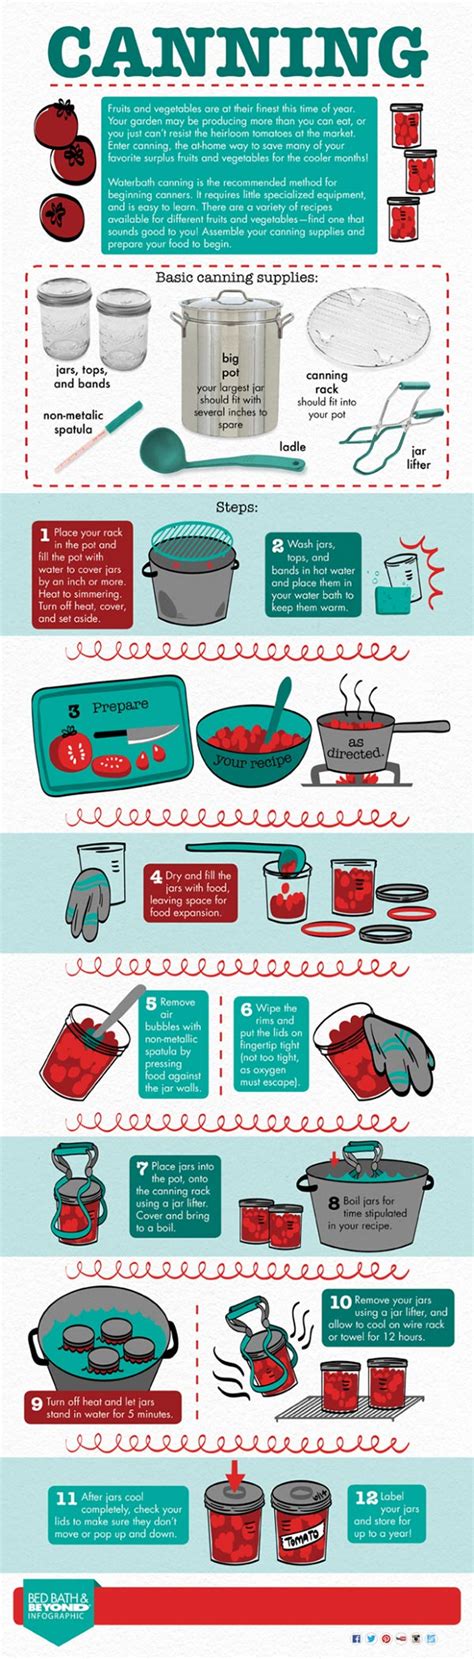
Having the right tools makes the canning process smoother and safer. Here’s a list of fundamental equipment you’ll need:
- Canning Jars: Use only mason-style canning jars designed for heat processing. Inspect them for cracks or chips.
- Lids and Bands: New lids are crucial for a proper seal; bands can be reused.
- Canner: A large stockpot with a rack for water bath canning, or a specialized pressure canner for low-acid foods.
- Jar Lifter: Essential for safely placing hot jars into and removing them from the canner.
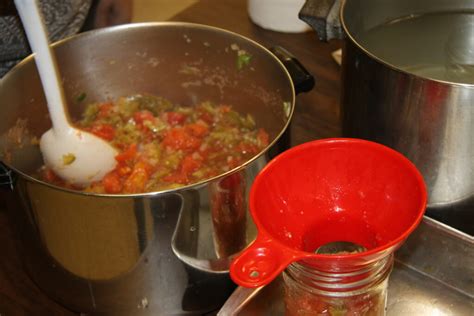
- Canning Funnel: Helps prevent spills and keeps jar rims clean.
- Bubble Remover/Headspace Tool: A non-metallic utensil to release air bubbles and measure headspace.
- Timer: For accurate processing times.
Cleanliness is paramount. Ensure all your equipment, especially jars and lids, are thoroughly washed and sanitized according to manufacturer instructions or canning guidelines.
Step-by-Step: Preparing Your Produce
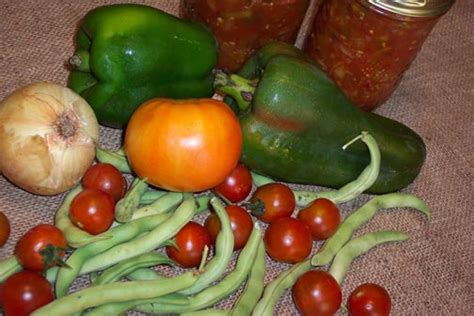
Once you have your equipment and understanding of safety, the preparation begins. For this guide, we’ll focus on a common water bath canning example: tomatoes.
- Select and Wash Produce: Choose ripe, blemish-free produce. Wash it thoroughly under cold running water. For tomatoes, remove stems and cores.
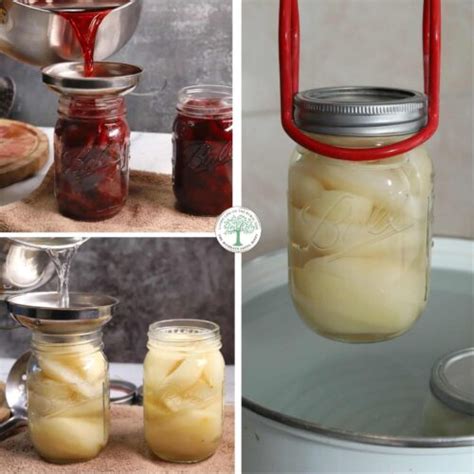
- Prepare Jars and Lids: Wash jars in hot, soapy water and rinse well. Keep them hot (e.g., in hot water bath or dishwasher) until filling to prevent thermal shock. Prepare lids according to manufacturer instructions (often a warm, but not boiling, water bath).
- Prepare Your Recipe: Follow your chosen, tested recipe. For whole or halved tomatoes, you might simply pack them raw or hot. For sauce, you’d cook and purée them. Add lemon juice or citric acid as specified in the recipe for safety, even for tomatoes.
- Fill Jars: Using a canning funnel, carefully fill jars with your prepared produce, leaving the specified headspace (the empty space between the food and the rim of the jar). This is usually 1/2 inch for most items.
- Remove Air Bubbles: Use your bubble remover tool to gently work out any trapped air bubbles. Add more liquid if necessary to maintain headspace.
- Wipe Rims: Clean jar rims thoroughly with a damp, clean cloth. Any food residue can prevent a proper seal.
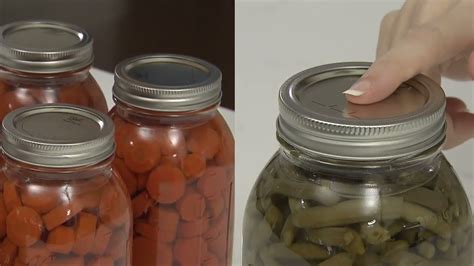
- Apply Lids and Bands: Place a warm lid centered on the jar. Screw on the band fingertip tight – not too loose, not too tight.
The Canning Process: Water Bath Method
For high-acid foods, the water bath method is straightforward:
- Prepare the Canner: Place the rack in the bottom of your water bath canner. Fill the canner halfway with water and bring it to a simmer (180°F/82°C) or boil (212°F/100°C), depending on your recipe’s instructions for hot or raw pack.
- Load Jars: Carefully lower the filled, lidded jars onto the rack using a jar lifter. Ensure jars are not touching each other.
- Add Water: Add more hot water if needed until the water level covers the tops of the jars by at least 1-2 inches.
- Process: Bring the water to a full, rolling boil. Once boiling vigorously, start your timer for the exact duration specified in your recipe. Adjust processing time if living at a higher altitude.
- Remove Jars: Once the processing time is complete, turn off the heat and let the jars sit in the hot water for 5 minutes (this helps prevent siphoning). Then, carefully remove the jars using the jar lifter and place them on a towel-lined surface or cooling rack, ensuring they are not touching.
Crucial Safety Measures and Troubleshooting
After processing, allow jars to cool undisturbed for 12-24 hours. During this time, you’ll often hear a satisfying ‘ping’ as the lids seal. Do not retighten bands during cooling.
- Check for Seals: After cooling, remove the bands and press down on the center of each lid. If it doesn’t flex, the jar is sealed. If a lid flexes, it hasn’t sealed properly. Refrigerate and consume this produce within a few days, or reprocess within 24 hours with a new lid (following full processing time again).
- Storage: Store sealed jars without bands in a cool, dark, dry place. Remove bands to prevent false seals and to allow for easier detection of spoilage.
- Signs of Spoilage: Before consuming, always inspect jars for signs of spoilage: bulging lids, broken seals, cloudy liquid, mold, or an off-odor. If any of these are present, discard the food immediately without tasting it.
By following these easy steps and prioritizing safety, you’ll be well on your way to enjoying your garden’s bounty year-round, adding a rewarding skill to your DIY repertoire.