What are easy ways to dry fresh garden herbs for winter cooking & tea?

Harvesting and Preserving Your Garden’s Bounty
As the gardening season winds down, don’t let your abundant fresh herbs go to waste. Drying herbs is a fantastic way to capture their vibrant flavors and aromas, extending their usefulness long into the colder months. Imagine infusing your winter dishes with rosemary, thyme, or oregano straight from your pantry, or brewing soothing herbal teas with your own dried mint or chamomile. The process is surprisingly simple, often requiring minimal equipment, and yields a satisfying reward.
Before diving into specific drying methods, remember to harvest your herbs in the morning after the dew has evaporated but before the sun gets too hot, when their essential oils are most concentrated. Gently rinse them if necessary and pat them thoroughly dry to prevent mold during the drying process. Here are some of the easiest and most popular ways to preserve your garden’s green treasures.
Air Drying: The Timeless Method
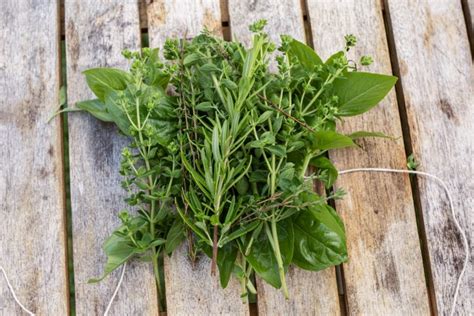
Air drying is arguably the most traditional and simplest method, perfect for herbs with lower moisture content and sturdy stems like rosemary, thyme, oregano, marjoram, sage, and lavender. This method requires patience but little hands-on effort.
Gather small bundles of 5-10 stems and tie them together securely at the base with string or a rubber band. Hang these bundles upside down in a warm, dry, well-ventilated area away from direct sunlight. An attic, pantry, or even a corner of your kitchen can work. Darker spots help preserve the color and flavor of the herbs. Ensure there’s good air circulation around each bundle to prevent mold. Depending on the herb and humidity, drying can take anywhere from one to three weeks. You’ll know they’re ready when the leaves are brittle and easily crumble between your fingers.
Oven Drying: A Quicker Approach
If you’re short on time or space for air drying, your oven can come to the rescue, especially for herbs like parsley, cilantro, or basil that have a higher moisture content and might not air dry as well. The key here is low heat and vigilance.
Preheat your oven to its lowest setting, ideally no more than 100-150°F (38-65°C). Spread your washed and thoroughly dried herb leaves in a single layer on a baking sheet. You can use parchment paper to prevent sticking. Place the baking sheet in the oven and leave the door slightly ajar to allow moisture to escape. Check the herbs every 15-30 minutes, turning them occasionally. Drying can take 1-4 hours, depending on the herb. They are done when they are completely dry and brittle.

Utilizing a Food Dehydrator
A food dehydrator offers a consistent and controlled environment, making it an excellent investment if you plan to dry large quantities of herbs or a variety of produce. Dehydrators are designed to remove moisture efficiently while preserving flavor and nutrients.
Simply spread your herb leaves in a single layer on the dehydrator trays, ensuring good airflow around them. Set the temperature according to your dehydrator’s instructions for herbs, typically between 95-125°F (35-52°C). Drying times can range from a few hours to a full day. Monitor them periodically until they are completely crisp and dry.

The Microwave Method: For Small Batches and Instant Needs
For a very small quantity of herbs or when you need dried herbs quickly, your microwave can be surprisingly effective. This method works best for delicate leaves like mint or dill.
Arrange a single layer of herb leaves on a paper towel-lined microwave-safe plate. Cover with another paper towel. Microwave on high for 30 seconds, then check. Continue microwaving in 15-30 second intervals, checking frequently, until the herbs are dry and brittle. This can take anywhere from 1 to 3 minutes total, depending on the herb and microwave wattage. Be careful not to burn them!
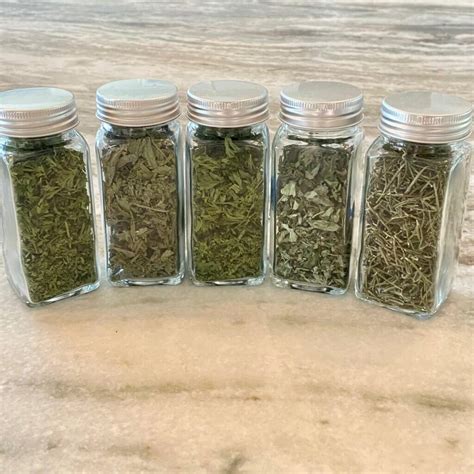
Proper Storage for Long-Lasting Flavor
Once your herbs are thoroughly dried, the way you store them is crucial for maintaining their potency. Remove the dried leaves from their stems (if air-dried) and either store them whole or gently crumble them. Storing them whole helps preserve their volatile oils longer, and you can crush them just before use.
Transfer the dried herbs to airtight containers, such as glass jars with tight-fitting lids. Store these containers in a cool, dark place away from direct sunlight, heat, and humidity. Label each container with the herb name and the date it was dried. Properly stored, dried herbs can retain their flavor for 6-12 months.
Enjoying Your Dried Herbs in Winter
With a pantry full of your own dried herbs, winter cooking becomes a delight. Use them in soups, stews, roasted vegetables, pasta sauces, and marinades. Remember that dried herbs are more concentrated than fresh ones, so generally use about one-third the amount called for in a recipe. For teas, simply steep a teaspoon or two of your favorite dried herbal leaves (like mint, chamomile, lemon balm, or verbena) in hot water for a comforting and aromatic beverage.

Drying your garden herbs is a simple, rewarding process that connects you to your garden all year round. Experiment with different methods to find what works best for your specific herbs and lifestyle. Happy drying, and enjoy the delicious flavors of your labor!