


What DIY compost blend yields the richest soil for a kitchen garden?

Unlocking the Power of Your Own Black Gold
For any aspiring or seasoned kitchen gardener, the secret to abundant harvests and vibrant plants lies beneath the surface: in the soil. While store-bought amendments offer convenience, crafting your own compost allows for precise control over nutrient content, yielding a truly rich and living soil tailored to your garden’s needs. The quest for the ‘richest soil’ through DIY composting isn’t just about breaking down organic matter; it’s about orchestrating a symphony of ingredients to create a nutrient powerhouse.
This guide will delve into the art and science of formulating the ultimate DIY compost blend, focusing on the key components and special additions that transform ordinary kitchen waste and garden debris into a premium soil amendment capable of supercharging your vegetables and herbs.
The Carbon-Nitrogen Dance: The Foundation of Richness
At the heart of successful composting is the delicate balance between carbon (browns) and nitrogen (greens). Carbon-rich materials provide energy for the microbes, while nitrogen-rich materials supply the proteins needed for their growth and reproduction. An optimal carbon-to-nitrogen (C:N) ratio, ideally between 25:1 and 30:1, is crucial for rapid decomposition and the creation of nutrient-dense humus.
- Greens (Nitrogen-rich): These are typically fresh, moist, and often green in color. They include fresh grass clippings, fruit and vegetable scraps, coffee grounds, tea bags, and fresh plant trimmings. They heat up the pile and fuel microbial activity.
- Browns (Carbon-rich): These are usually dry, woody, and brown. Think fallen leaves, straw, shredded paper or cardboard, wood chips, and small twigs. Browns add bulk, help with aeration, and serve as a long-term energy source for decomposers.
Achieving a good balance often translates to roughly two to three parts brown materials to one part green materials by volume. Layering or thoroughly mixing these components is essential for an even decomposition process.
Crafting the Ultimate Enriching Blend for Your Kitchen Garden
While a basic mix of greens and browns will yield functional compost, to achieve truly ‘rich’ soil, we need to consider specific ingredients that contribute a broader spectrum of nutrients and beneficial properties. Here’s how to elevate your compost:
Core Ingredients for Nutrient Density:
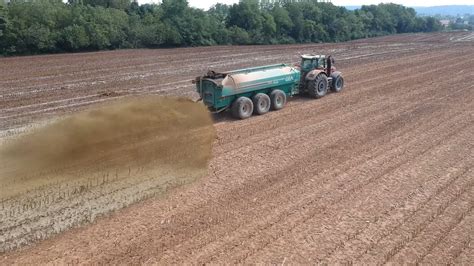
- Aged Manure: If available, aged chicken, cow, horse, or rabbit manure is a gold standard. It’s rich in nitrogen, phosphorus, potassium, and micronutrients, significantly boosting the overall fertility of your compost. Ensure it is well-aged to prevent burning plants.
- Coffee Grounds: A powerhouse of nitrogen, phosphorus, potassium, and trace minerals like magnesium and copper. They also add a slightly acidic pH, beneficial for many garden vegetables.
- Alfalfa Meal: Derived from alfalfa plants, this is a fantastic source of nitrogen, along with natural growth hormones and other micronutrients. It’s often used as a direct soil amendment but can be a powerful compost additive.
- Seaweed or Kelp Meal: These marine treasures are packed with an incredible array of trace minerals, hormones, and vitamins beneficial for plant growth and stress resistance. They act as a slow-release fertilizer and stimulate microbial activity.
- Rock Dust (e.g., Azomite, Glacial Rock Dust): These finely ground volcanic or mineral rocks replenish depleted soils with a vast range of essential trace minerals, which are often lacking in standard compost. This ensures your vegetables receive a full suite of elements for optimal health and flavor.
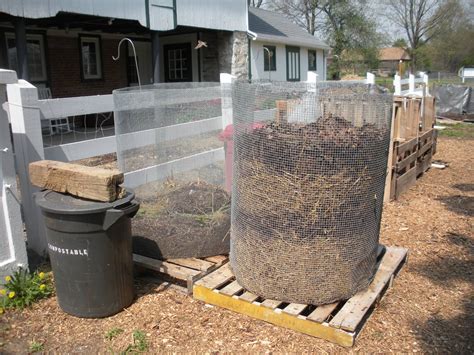
Building Your Super-Compost Pile:
When assembling your pile, think in layers. Start with a base of coarser brown materials for drainage and aeration. Then, alternate thin layers of greens and browns, incorporating your enriching additives throughout. For example:
- Layer of straw/shredded leaves (browns)
- Layer of kitchen scraps/grass clippings (greens)
- Sprinkle of coffee grounds and alfalfa meal
- Thin layer of aged manure
- Layer of straw/shredded leaves (browns)
- Sprinkle of rock dust or kelp meal
Repeat this layering process, ensuring the pile remains consistently moist (like a wrung-out sponge) and is turned regularly (weekly to bi-weekly) to aerate and mix the materials. Aeration is critical for preventing anaerobic conditions and speeding up decomposition.
Maintaining and Using Your Premium Compost
Patience is key; rich, mature compost typically takes anywhere from 2 months to a year to develop, depending on your blend, turning frequency, and environmental conditions. You’ll know it’s ready when it’s dark brown, crumbly, smells earthy, and you can no longer identify the original ingredients.
Once ready, this ‘black gold’ can be incorporated into your kitchen garden in various ways:
- Soil Amendment: Mix a 1-3 inch layer into your garden beds before planting.
- Top-Dressing: Spread a thin layer around existing plants to provide a slow release of nutrients and conserve moisture.
- Potting Mix Component: Blend with coir or peat and perlite for an incredibly fertile seed-starting or potting mix.
The Reward: A Thriving Kitchen Garden
By consciously selecting and blending ingredients, you’re not just making compost; you’re cultivating a vibrant ecosystem within your soil. This enriched, living soil will lead to stronger, healthier plants that are more resistant to pests and diseases, producing an abundance of nutrient-dense fruits, vegetables, and herbs for your kitchen. The effort invested in your DIY compost blend will undoubtedly yield the richest rewards in your garden.


