


What’s the best DIY method to build a durable, predator-proof chicken coop?

Ensuring the safety and well-being of your backyard flock starts with a well-built chicken coop. More than just shelter, a truly effective coop must be both durable enough to withstand the elements and an impenetrable fortress against a host of predators, from raccoons and foxes to airborne raptors. While store-bought options exist, a DIY approach allows for customization, higher quality materials, and superior predator-proofing tailored to your specific environment. This guide outlines the best methods to construct a resilient and secure home for your chickens.
Planning and Design: The Blueprint for Success
Before lifting a single hammer, meticulous planning is crucial. Determine the ideal size based on the number of chickens you plan to keep, generally allowing 3-4 square feet per bird inside the coop and 8-10 square feet per bird in an attached run. Consider your local climate – does it need extra insulation for winter or superior ventilation for summer? Sketch out your design, incorporating dedicated spaces for roosting, nesting boxes, and easy access for cleaning and egg collection.

Material Selection for Ultimate Durability
The longevity of your coop hinges on the materials you choose. Opt for pressure-treated lumber (rated for ground contact) for the base and framing to resist rot and pests. For walls and roofing, exterior-grade plywood (at least 1/2-inch thick) or T1-11 siding offers good protection, topped with robust metal roofing or heavy-duty asphalt shingles. Avoid particle board or OSB for anything exposed to moisture. For the floor, a solid plywood base covered with linoleum or vinyl makes cleaning easier, or consider a raised floor with hardware cloth underneath for ventilation and rodent deterrence.

Predator-proofing starts with the right wire: NEVER use standard chicken wire for predator protection. Its large openings and thin gauge make it easily torn by predators. Instead, invest in galvanized 1/2-inch or 1/4-inch hardware cloth. This heavy-gauge, welded wire mesh is significantly stronger and more resistant to chewing and tearing.
Fortifying Against Predators: An Impenetrable Fortress
This is where your DIY coop truly shines. Every potential entry point must be secured:
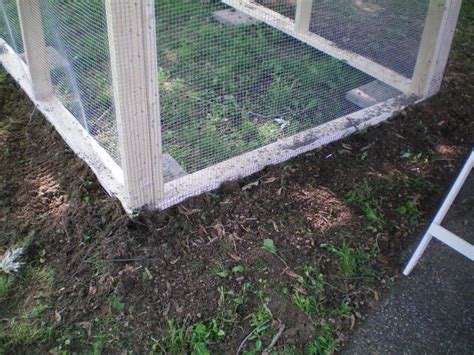
- The Foundation: Dig a trench around the perimeter of your coop and run, at least 12-18 inches deep and 12 inches wide. Bury a hardware cloth apron in this trench, bending it outward to deter digging predators.
- Walls and Roof: Ensure all walls are solid and free of gaps. Cover any ventilation openings or windows with hardware cloth securely fastened. The roof must be firmly attached and free of weak points.
- Doors and Latches: All doors, including access doors for humans and pop-holes for chickens, must have robust, predator-proof latches. Use barrel bolts, spring-loaded latches, or carabiners, and consider using two latches per door for extra security. Ensure doors fit snugly within their frames, leaving no gaps.
Essential Features for Coop Functionality and Chicken Comfort
Beyond security, a great coop prioritizes the well-being of your chickens:
- Ventilation: Adequate airflow is vital to prevent respiratory issues and control humidity. Install screened vents high near the roofline and lower near the floor, ensuring they are covered with hardware cloth.
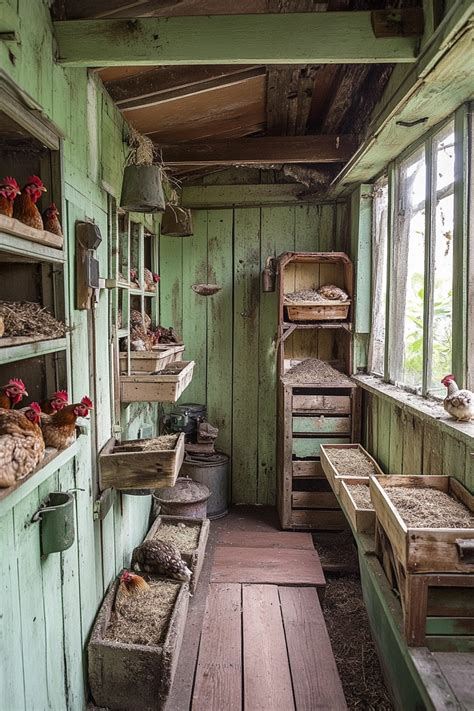
- Nesting Boxes: Provide one nesting box for every 3-4 hens, ideally raised off the ground and in a dark, quiet area.
- Roosting Bars: Chickens prefer to sleep on elevated roosts. Provide sturdy, rounded roosting bars (2×2 lumber with rounded edges works well) at varying heights, above the nesting boxes.
- Easy Cleaning Access: Design the coop with a large human-sized door or a removable floor/panel for effortless cleaning and maintenance.
Step-by-Step Construction Overview
- Build the Base and Foundation: Create a sturdy base, incorporating the buried hardware cloth apron.
- Frame the Structure: Erect walls, roof supports, and interior partitions using treated lumber.
- Install Siding and Roofing: Attach exterior-grade plywood or siding, then secure your chosen roofing material.
- Secure Hardware Cloth: Cover all openings, windows, and the run (if attached) with heavy-duty hardware cloth, fastening it every few inches with screws and washers or heavy-duty staples.
- Install Doors and Latches: Hang all doors and equip them with multiple, secure predator-proof latches.
- Add Interior Elements: Install roosting bars, nesting boxes, and feeders/waterers.
- Seal and Inspect: Caulk any small gaps, and meticulously inspect the entire structure for any potential weaknesses or predator entry points.

Conclusion
Building a durable, predator-proof chicken coop is a rewarding DIY project that ensures the safety and happiness of your flock for years to come. By investing in quality materials, employing robust construction techniques, and focusing intensely on predator deterrence, you can create a secure haven that provides peace of mind and fresh eggs.


