


What’s the best homemade compost recipe for healthy garden soil?

Unlock Your Garden’s Potential with Homemade Compost
Creating your own compost is one of the most impactful things you can do for your garden. It’s a sustainable way to recycle kitchen and yard waste, transforming it into a nutrient-rich soil amendment that boosts plant health, improves soil structure, and reduces the need for chemical fertilizers. The secret to a successful compost pile lies in understanding the ‘recipe’ – the right balance of ingredients and conditions.
The Golden Ratio: Browns vs. Greens
At the heart of any effective compost recipe is the balance between ‘brown’ and ‘green’ materials. Think of it as balancing carbon (browns) and nitrogen (greens). Microorganisms, the tiny workers breaking down your waste, need both to thrive.
- Brown Materials (Carbon-rich): These provide energy for the microbes and add bulk to the pile. Examples include dried leaves, straw, wood chips, shredded newspaper, cardboard, and sawdust.
- Green Materials (Nitrogen-rich): These provide protein for the microbes, accelerating the decomposition process. Examples include grass clippings, fresh plant trimmings, fruit and vegetable scraps, coffee grounds, and tea bags.
The ideal ratio is generally considered to be 2-3 parts brown to 1 part green by volume. Don’t worry about being precise; a good mix is more important than exact measurements.
Essential Ingredients and What to Avoid
Let’s break down the best materials to include and what to keep out of your compost bin.
Best Brown Ingredients:
- Dried leaves
- Straw or hay
- Shredded newspaper and cardboard (non-glossy, non-colored)
- Small twigs and wood chips (in moderation)
- Sawdust (from untreated wood)
- Pine needles
Best Green Ingredients:
- Fruit and vegetable scraps (peels, cores, spoiled produce)
- Grass clippings (in thin layers to prevent matting and odor)
- Coffee grounds and filters
- Tea bags
- Fresh garden trimmings (free of diseases or seeds)
- Eggshells (crushed)
Materials to Avoid:
- Meat, bones, dairy products, and oily foods (attract pests, create odors)
- Pet waste (may contain pathogens)
- Diseased plants (can spread disease)
- Weeds with seeds (can re-sprout in your garden)
- Chemically treated wood or plants (can introduce toxins)
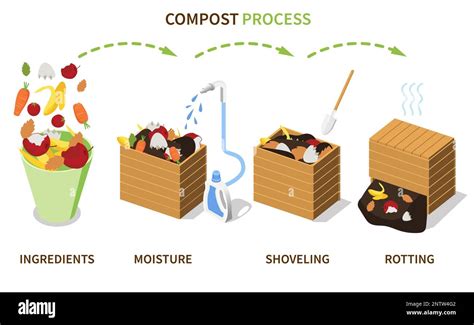
Building Your Compost Pile: The Method
Once you have your materials, it’s time to assemble your compost pile or fill your bin. The layering method is popular and effective:
- Choose Your Spot: Select a shady or partly shady spot with good drainage.
- Start with Browns: Lay down a 4-6 inch layer of coarse brown material (twigs, straw) at the bottom for aeration.
- Alternate Layers: Add a 2-4 inch layer of green material, then a 4-6 inch layer of brown. Repeat this pattern.
- Moisture: Lightly moisten each layer as you add it. The pile should feel like a damp sponge – not soaking wet, not dry.
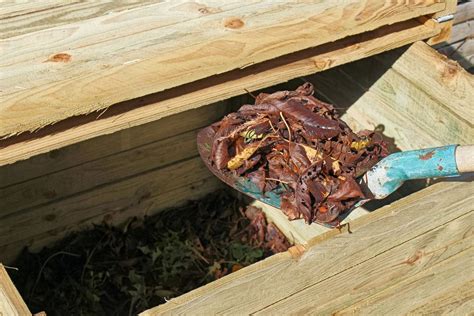
- Aeration: Periodically turn the pile with a pitchfork to introduce oxygen. This is crucial for rapid decomposition and prevents anaerobic conditions that lead to foul odors. Aim to turn it every 1-2 weeks, especially when adding new material.

Maintaining and Troubleshooting
Your compost pile is a living system that needs a little care:
- Moisture: If it’s too dry, decomposition slows. Add water gradually. If it’s too wet, it can become slimy and smelly. Add more brown materials and turn it.
- Air: A lack of oxygen leads to odors. Turn your pile regularly.
- Temperature: An active pile will generate heat. This is a sign the microbes are working!
When Is It Ready?
Finished compost is dark brown, crumbly, and has an earthy smell. You shouldn’t be able to identify the original materials. Depending on your methods and the materials used, this process can take anywhere from two months to a year. A good rule of thumb is that if it’s no longer generating heat and looks uniform, it’s ready.
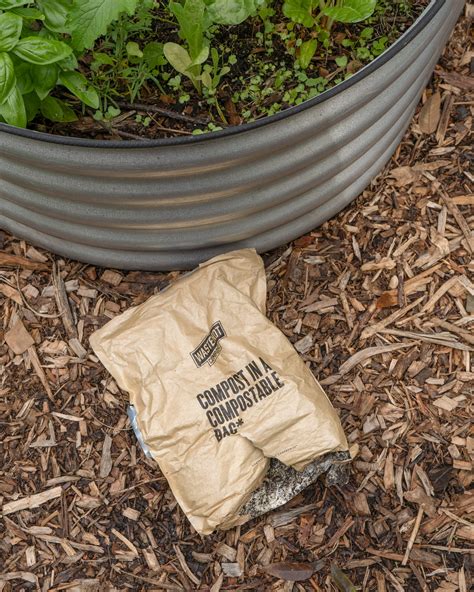
Using Your Homemade Compost
Once ready, your compost is a garden superfood! Spread it as a top dressing around plants, incorporate it into new garden beds, mix it with potting soil, or use it to amend existing soil. Its benefits include:
- Improving soil structure and drainage
- Retaining moisture
- Suppressing plant diseases and pests
- Providing essential nutrients for healthy plant growth
- Balancing soil pH
Cultivate a Healthier Garden Today
Making your own compost is a rewarding process that transforms waste into a valuable resource. By following this simple ‘recipe’ of balancing browns and greens, maintaining moisture, and ensuring good aeration, you’ll be well on your way to creating rich, healthy soil that will help your garden thrive for years to come. Start composting today and watch your garden flourish!


