What’s the best real food recipe for homemade sourdough starter, country style?
Embracing the Art of Country-Style Sourdough
Creating your own sourdough starter from scratch is a deeply rewarding culinary endeavor, especially when you aim for a ‘country style’ approach using real food ingredients. This method focuses on simplicity, natural fermentation, and robust flavors, reminiscent of traditional baking practices. Forget complex additives or commercial yeasts; the heart of this starter lies in just two fundamental components: flour and water, combined with patience and a little warmth.
A country-style starter thrives on minimal intervention and a close relationship with natural yeasts present in the environment and on the flour itself. It’s about cultivating a living organism that will become the soul of your homemade breads, imparting that characteristic tangy flavor and chewy texture that store-bought loaves simply can’t replicate.

The Philosophy Behind “Real Food” Sourdough
The term “real food” in this context emphasizes using high-quality, minimally processed ingredients. For your sourdough starter, this means making careful choices about your flour and water. While all-purpose flour can work, opting for unbleached varieties, organic flours, or even flours with some whole grain content (like whole wheat or rye) can significantly boost the microbial activity in your starter, as these flours contain more natural nutrients and wild yeasts.
Flour: Begin with unbleached all-purpose flour. Organic whole wheat or rye flour can be excellent activators due to their higher nutrient content and natural yeast presence, often used in the initial stages to kickstart activity. You can then transition to feeding with unbleached all-purpose or bread flour once established. Avoid bleached flours, as the bleaching process can inhibit yeast activity.
Water: Use unchlorinated, unfluoridated water. Tap water that has been left out for 24 hours can work, or filtered water, spring water, or bottled water. Chlorine and fluoride can kill the beneficial microorganisms you’re trying to cultivate.
Gathering Your Simple Toolkit
One of the beauties of country-style sourdough is its minimal equipment requirement. You likely have most of these items already:
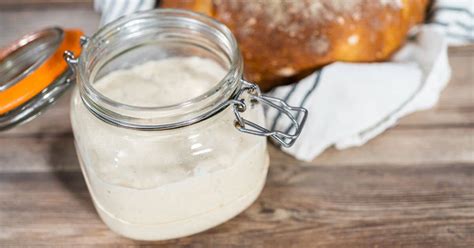
- Glass Jar: A wide-mouth glass jar (pint to quart size) is ideal. Glass allows you to observe the activity, and a wide mouth makes feeding and stirring easy.
- Lid: Not airtight! A loose-fitting lid, plastic wrap, or a breathable cloth secured with a rubber band will protect your starter while allowing air circulation.
- Scale: A digital kitchen scale is highly recommended for precise measurements. This ensures consistency and better results, especially with hydration levels.
- Spatula or Spoon: For mixing.
- Rubber Band or Marker: To mark the initial level of your starter after feeding, helping you track its rise.
Step-by-Step: Crafting Your Starter from Scratch
Patience is key. This process typically takes 5-7 days, sometimes longer, depending on your environment.
Day 1: The Inaugural Mix
In your clean glass jar, combine 50g whole wheat or rye flour with 50g unchlorinated water. Mix thoroughly until no dry spots remain. The consistency should be like a thick paste. Cover loosely and place in a warm spot (70-78°F / 21-26°C) for 24 hours.
Day 2-3: The Waiting Game
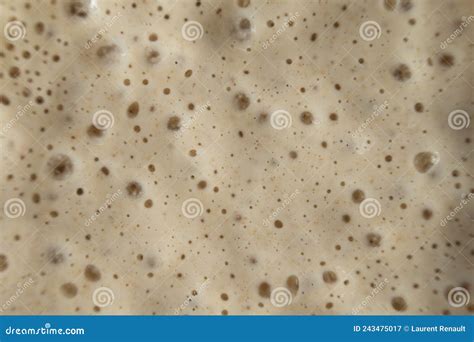
You might see little to no activity. That’s normal. Some tiny bubbles or a slight sour smell might emerge. Do not feed yet. Just stir once or twice a day and cover loosely. Maintain the warm environment.
Day 4: First Feeding
Discard all but 50g of your starter. To the remaining 50g, add 50g unbleached all-purpose flour and 50g unchlorinated water. Mix well, mark the level, and cover loosely. Return to your warm spot for 12-24 hours. You should start seeing more bubbles and a slight rise.
Day 5-7: Regular Feeding Schedule
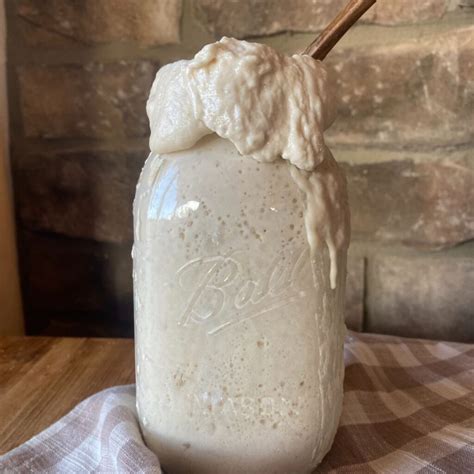
Now, you’ll start feeding twice a day, roughly every 12 hours. Each feeding: discard all but 50g of starter, then feed with 50g unbleached all-purpose flour and 50g unchlorinated water. By day 7, your starter should be consistently doubling in size within 4-8 hours after feeding, be very bubbly, and smell pleasantly yeasty and sour.
Maintaining a Healthy, Active Starter
Once active, your starter needs regular care. If baking frequently (daily/every few days), keep it on the counter and feed it every 12-24 hours. If baking less often, store it in the refrigerator. When refrigerated, feed it once a week: take it out, let it warm up for an hour, discard most, feed, let it sit on the counter for 4-8 hours until bubbly, then return to the fridge.
Remember the 1:1:1 ratio for feeding (1 part starter : 1 part flour : 1 part water by weight) is a common and effective method for maintenance. Adjust quantities based on how much starter you need for your baking.
Troubleshooting and Tips for Success
- Sluggish Starter: If your starter is slow to activate, try adding a small amount (a teaspoon) of whole wheat or rye flour to your feeding for a few days. Ensure it’s in a consistently warm environment.
- Hooch (dark liquid): A dark liquid on top indicates your starter is hungry. Stir it in (it adds flavor) and feed more frequently or in larger quantities.
- Mold: If you see any colored mold (pink, orange, green, black), discard the entire starter and start over. This is rare with proper hygiene.
- Patience: Some starters take longer to establish than others. Don’t get discouraged! Environmental factors play a huge role.
- Consistency: Regular feeding on a schedule is crucial for developing a strong, consistent starter.
Your Sourdough Journey Begins
Creating a country-style sourdough starter with real food ingredients is more than just a recipe; it’s a connection to traditional baking and a deeper appreciation for natural processes. With a little care and consistency, you’ll soon have a thriving starter ready to transform into delicious, wholesome homemade bread that embodies the true spirit of real food.