


What’s the easiest DIY method to preserve excess garden herbs naturally?

Embracing Your Bountiful Herb Garden
There’s nothing quite like the vibrant flavors and aromas of fresh herbs straight from the garden. However, when your basil is flourishing, your oregano is overflowing, and your mint is on the verge of taking over, you might find yourself with more green goodness than you can use immediately. Rather than letting your precious harvest go to waste, natural preservation offers a rewarding solution that keeps your pantry stocked with garden-fresh flavor all year long.
Many traditional methods exist for extending the life of herbs, but for the home gardener seeking simplicity and efficacy, a few stand out as remarkably easy and entirely natural. These DIY approaches require minimal equipment and transform your abundant yield into a sustainable source of seasoning and enjoyment.
Air Drying: The Quintessential Easy Method
For centuries, air drying has been the go-to method for preserving herbs, and it remains one of the easiest and most natural DIY approaches. It requires no special appliances beyond a little patience and a suitable environment. Herbs like oregano, thyme, rosemary, bay leaves, sage, and dill are particularly well-suited for air drying, retaining their robust flavors beautifully.
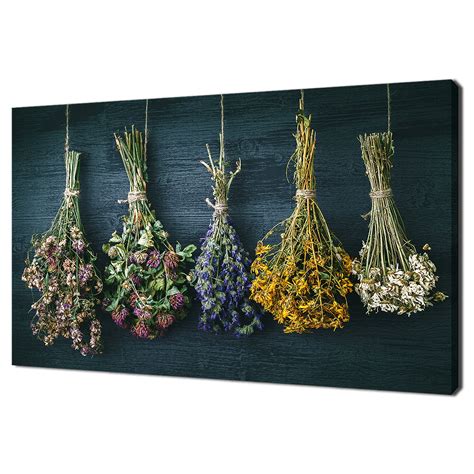
The beauty of air drying lies in its simplicity. By gently removing moisture, you concentrate the herb’s essential oils and flavors, creating a potent ingredient ready for culinary use. This method is not only cost-effective but also adds a rustic charm to your kitchen as bundles of herbs hang to dry.
Step-by-Step Guide to Air Drying Herbs
- Harvest Smartly: Choose healthy, mature stems early in the morning after the dew has dried but before the sun gets too hot. Avoid any herbs showing signs of disease or pest damage.
- Clean Gently: If your herbs are visibly dusty or dirty, rinse them very quickly under cool water and pat them thoroughly dry with a clean cloth or paper towels. For most herbs, simply shaking off any loose dirt is sufficient.
- Bundle Up: Gather small bunches of 5-10 stems, depending on their thickness. Tie the stems together securely with kitchen twine or a rubber band. Don’t make the bundles too large, as this can trap moisture and lead to mold.
- Find the Right Spot: Hang your herb bundles upside down in a warm, dry, well-ventilated area away from direct sunlight. A pantry, a corner of your kitchen, or a garage can work well. Good air circulation is crucial to prevent mold.
- Monitor and Wait: Drying time varies based on the herb and humidity, typically taking 1-3 weeks. The herbs are fully dried when they crumble easily between your fingers and feel brittle.

Tips for Optimal Air Drying
- Avoid Washing Delicate Herbs: If herbs like mint or basil are not visibly dirty, avoid washing them as extra moisture can hinder drying and promote mold.
- Don’t Overcrowd: Ensure there’s plenty of space around each bundle for air to circulate freely.
- Check for Mold: Inspect your herbs periodically for any signs of mold. If you see mold, discard the affected bundle.
- Test for Dryness: A fully dried herb will snap or crumble easily. If it bends, it still has moisture and needs more time.
Beyond Air Drying: Other Natural & Easy Approaches
While air drying is fantastic for many herbs, others benefit from slightly different easy preservation methods, particularly those with higher moisture content or delicate leaves.
Freezing Herbs: Quick and Flavorful
Freezing is an incredibly easy and effective method, especially for soft-leafy herbs like basil, parsley, cilantro, chives, and mint. It preserves their fresh flavor and vibrant color much better than drying for many culinary uses.
- Chop and Cube: Finely chop your fresh herbs. Pack them into ice cube trays, filling each compartment about two-thirds full.
- Add Liquid: Pour a small amount of water or olive oil over the herbs until they are just covered. The liquid helps protect them from freezer burn.
- Freeze Solid: Place the trays in the freezer until the cubes are completely frozen.
- Store: Once frozen, pop the herb cubes out of the trays and transfer them to freezer-safe bags or containers. Label with the herb name and date.

Storing and Enjoying Your Preserved Herbs
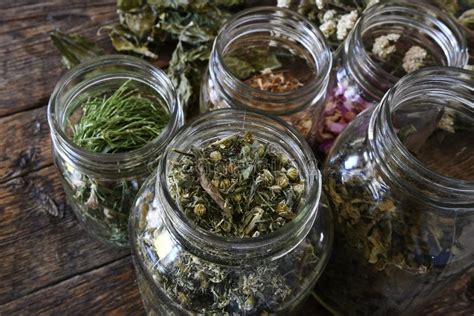
Once your herbs are fully dried or frozen, proper storage is key to maintaining their quality. Store dried herbs in airtight containers – glass jars with tight-fitting lids are ideal – in a cool, dark place away from direct sunlight and heat. This protects them from moisture and light, which can degrade their flavor and color. Whole leaves retain flavor longer than crumbled ones, so it’s best to crumble them just before use. Frozen herb cubes can be added directly to soups, stews, sauces, or stir-fries.
Preserved herbs, whether dried or frozen, offer a convenient way to add depth and freshness to your cooking long after the growing season has ended. They are a testament to the simple joy of working with nature and enjoying your garden’s bounty all year long.
Conclusion
Preserving your excess garden herbs naturally doesn’t have to be complicated. With straightforward methods like air drying and freezing, you can easily transform a fleeting harvest into a lasting treasure. These DIY techniques not only save you money but also connect you more deeply with the food you eat, ensuring you have natural, flavorful ingredients at your fingertips, straight from your garden to your table.


