What’s your best recipe for homemade sourdough starter using country flour?

Embracing the Rustic Charm: Sourdough Starter with Country Flour
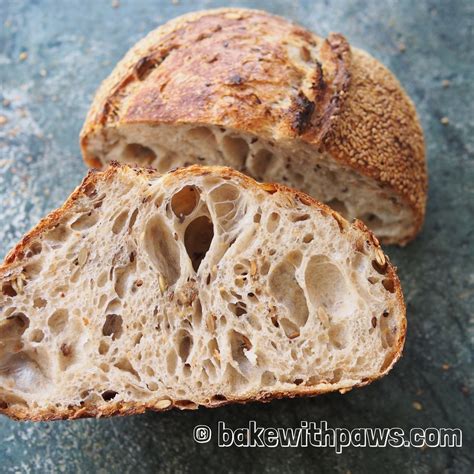
Creating your own sourdough starter is a magical process, transforming simple flour and water into a living culture that can leaven incredible bread. While many recipes opt for all-purpose or bread flour, utilizing country flour (often a whole grain or a blend of regional grains) brings a unique depth of flavor and character to your starter, often reflecting the terroir of the grains themselves. It might take a little more patience, but the results are undeniably rewarding.
My best recipe focuses on simplicity, consistency, and tuning into the natural rhythm of your chosen flour. Country flours, especially those that are stone-ground or contain a higher bran content, are often rich in the wild yeasts and bacteria needed to kickstart a robust starter.

Gathering Your Essential Ingredients and Tools
Before you begin, ensure you have quality ingredients and the right setup. The success of your starter hinges on these:
- Country Flour: Choose an unbleached, organic country flour. This could be whole wheat, spelt, rye, or a specific regional grain blend. The less processed, the better, as it retains more of the microorganisms naturally present.
- Water: Filtered, unchlorinated water is crucial. Chlorine can inhibit yeast activity. If you don’t have a filter, you can leave tap water out in an open container overnight to allow chlorine to evaporate.
- Glass Jar: A wide-mouthed glass jar (pint or quart size) is ideal. It allows for easy mixing and observation.
- Kitchen Scale: For accurate measurements. Sourdough success often comes down to precise ratios by weight.
- Spatula or Spoon: Non-reactive, for mixing.
- Loose Cover: A clean kitchen towel, cheesecloth, or the jar’s lid placed loosely on top to allow air circulation but keep out contaminants.
The Initial Mix: Day 1
This is where your starter’s journey begins. The goal is to combine equal parts flour and water to create an environment where wild yeasts can begin to multiply.
- Combine: In your clean glass jar, combine 50g (approximately 1/2 cup) of your chosen country flour with 50g (approximately 1/4 cup) of filtered water.
- Mix Thoroughly: Stir with your spatula or spoon until there are no dry spots and the mixture is well combined into a thick paste. It should resemble a thick pancake batter.
- Cover and Rest: Loosely cover the jar and place it in a warm spot (ideally 70-78°F / 21-26°C) away from direct sunlight.
Do not feed it again for the next 24 hours. Observe. You might not see much activity yet, but microscopic life is already at work.

The Awakening: Day 2 – Day 6+ (Daily Feedings Begin)
From day 2 onwards, you’ll begin a regular feeding schedule. Country flours can sometimes take a little longer to become active, so patience is key.
- Discard: Each day, before feeding, discard all but 50g (about 1/4 cup) of your starter. This seems wasteful, but it helps manage the volume and ensures the starter has enough fresh food.
- Feed: To the remaining 50g of starter, add 50g of fresh country flour and 50g of filtered water.
- Mix and Observe: Stir thoroughly until well combined. Loosely cover and return to your warm spot.
Over these days, you should start seeing signs of life: small bubbles forming on the surface and sides, a gradual increase in volume after feeding, and a slightly yeasty, sometimes vinegary smell. If you’re using whole grain country flour, the initial smell might be a bit cheesy or funky; this is normal in the early stages as various microbes compete.
Reaching Maturity: When Your Starter is Ready
Your sourdough starter is considered active and ready to bake with when it consistently shows these signs, usually within 7-14 days (country flours can lean towards the longer end):
- Doubling in Size: After feeding, it should reliably double in volume within 4-8 hours at room temperature.
- Bubbly and Spongy: The texture should be full of bubbles, both on the surface and throughout the starter.
- Pleasant Aroma: It should smell pleasantly yeasty, slightly sweet, and tangy, like ripe fruit or good yogurt. The initial funky smells should have dissipated.
- Float Test: Take a small spoonful of starter (at its peak, after feeding) and drop it into a glass of water. If it floats, it’s ready!

Maintenance and Long-Term Care
Once your country flour starter is active, you have options for maintenance:
- Room Temperature: If you bake frequently (daily or every other day), keep it at room temperature and feed it once or twice a day using the 1:1:1 ratio (50g starter : 50g flour : 50g water).
- Refrigeration: For less frequent baking (once a week or less), store it in the refrigerator. Feed it as usual, let it sit out at room temperature for an hour or two, then place it in the fridge. Feed it once a week, taking it out a few hours before feeding to warm up.
- Reviving from the Fridge: When you’re ready to bake, take your starter out of the fridge, discard all but 50g, and feed it at least two times (12 hours apart) at room temperature to ensure it’s vigorous.
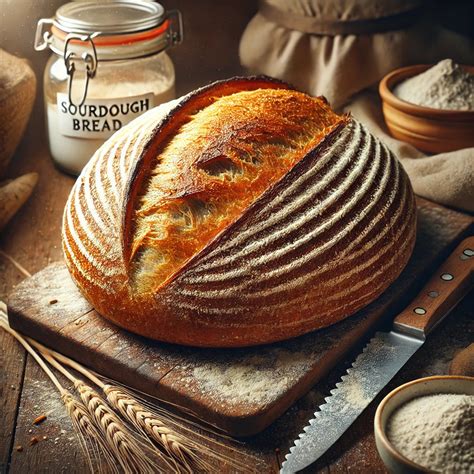
Using country flour for your sourdough starter imbues your bread with incredible flavor and a unique crumb. With a little daily care and observation, you’ll soon have a thriving starter, ready to transform your home baking into a truly artisanal experience.