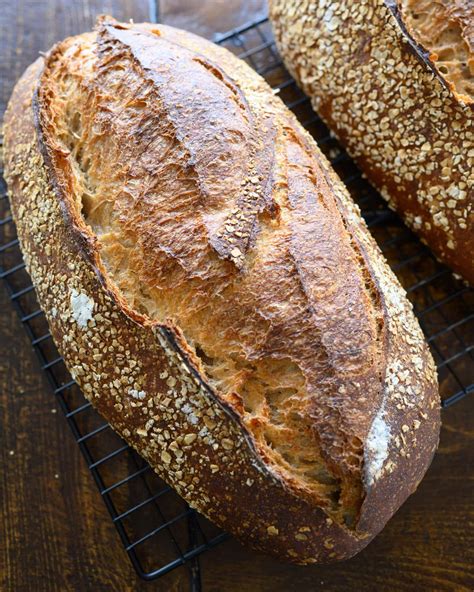
Why is my homemade sourdough bread dense?

There’s nothing quite like the satisfaction of slicing into a perfectly baked sourdough loaf with a beautifully open, airy crumb. But if your homemade sourdough bread consistently turns out dense, heavy, or brick-like, you’re not alone. This common baking challenge can be frustrating, especially after investing time and effort into nurturing your starter and following a recipe. Understanding the root causes is the first step towards achieving that coveted light and airy texture.
Understanding Why Your Sourdough Might Be Dense
Several factors can contribute to a dense sourdough loaf. Pinpointing the exact issue often requires a bit of detective work, but most problems fall into a few key categories:
1. Your Sourdough Starter Isn’t Active Enough
The health and vitality of your sourdough starter are paramount. A weak or sluggish starter won’t produce enough carbon dioxide during fermentation, leading to poor rise and a dense crumb. Ensure your starter is consistently fed, bubbly, and passes the float test before using it in your dough.

2. Insufficient Hydration
Sourdough typically requires higher hydration levels than many other breads to achieve its characteristic open crumb. If your dough is too stiff due to a low water content, the gluten network won’t be able to stretch and capture gas effectively, resulting in a tighter, denser texture. Don’t be afraid of sticky dough; it’s often a sign of good hydration.
3. Under-Developed Gluten Network
Gluten is the protein network that gives bread its structure and elasticity. Without proper kneading or folding, the gluten won’t develop sufficiently to trap the gases produced by the yeast and bacteria, leading to a flat, dense loaf. Techniques like stretch and folds are crucial for building strength in high-hydration sourdough.
4. Under-Proofing or Over-Proofing
Proofing, or bulk fermentation, is a critical stage.
If your dough is under-proofed, it hasn’t had enough time for the yeast and bacteria to produce sufficient gas, resulting in a dense, tight crumb with small, irregular holes.
Conversely, an over-proofed dough means the gluten structure has weakened and can no longer hold the gas, leading to collapse in the oven and a dense, often gummy texture. Finding the sweet spot for proofing takes practice and observation, often more than strict adherence to time.
![How to Cold Proof Sourdough [Your Easy Guide]](/images/aHR0cHM6Ly90czIubW0uYmluZy5uZXQvdGg/aWQ9T0lQLmZIZkRrRDFfMEZrd1NQTVdFRXNOSndIYUVLJnBpZD0xNS4x.webp)
5. Poor Shaping Techniques
Shaping isn’t just about aesthetics; it’s about building tension and creating a strong “skin” on the dough’s exterior. This tension helps the loaf hold its shape and expand upwards during baking. If your shaping is too loose, the dough will spread outwards instead of rising, resulting in a flatter, denser bread.
Tips for Achieving a Lighter, Airier Sourdough
Now that you know the potential pitfalls, here are actionable steps to troubleshoot and improve your sourdough texture:
- Nourish Your Starter: Feed your starter regularly with good quality flour and filtered water. Use it when it’s at its peak activity, usually 4-8 hours after feeding.
- Experiment with Hydration: Start with a recipe that suggests a hydration level (e.g., 70-75%) and gradually increase it in subsequent bakes if your dough feels too stiff, adjusting for your flour’s absorption.
- Master Gluten Development: Don’t skip the stretch and folds. Perform several sets during the bulk fermentation, ensuring the dough feels strong and elastic. The windowpane test is a good indicator of developed gluten.
- Observe Proofing, Don’t Just Time It: Learn to recognize the signs of a properly proofed dough. It should be jiggly, slightly expanded, and pass the poke test (a gentle poke leaves a slow-rebounding indentation). Environmental factors like temperature greatly affect proofing times.
- Refine Your Shaping: Practice shaping techniques that create good surface tension. A well-shaped loaf will spring up beautifully in the oven.
- Optimize Baking Conditions: Preheat your Dutch oven thoroughly. Baking in a very hot oven with steam (often achieved by baking in a covered Dutch oven for the first part) helps create a fantastic oven spring, contributing to an open crumb.
Final Thoughts
Baking sourdough is a journey of continuous learning and adaptation. Don’t be discouraged by a dense loaf; each bake offers valuable lessons. Pay close attention to your starter’s activity, the feel of your dough, and the conditions of your environment. With patience and persistence, you’ll soon be enjoying homemade sourdough with that wonderfully light and airy crumb you’ve been striving for.